
Step 2: Create a Vault on mobile
No matter if the repo is empty or started, you are going to need to create a new vault on mobile. However, if you have a vault already started on mobile that you wish to use, you can skip to Step 3: Link Vault to Repo.
- Open up the Obsidian mobile app on your device
- If this is your first time doing so you will be greeted by the new vault screen. If not you will need to go into the menu and choose to create a new vault.
- Press the
Create a vaultbutton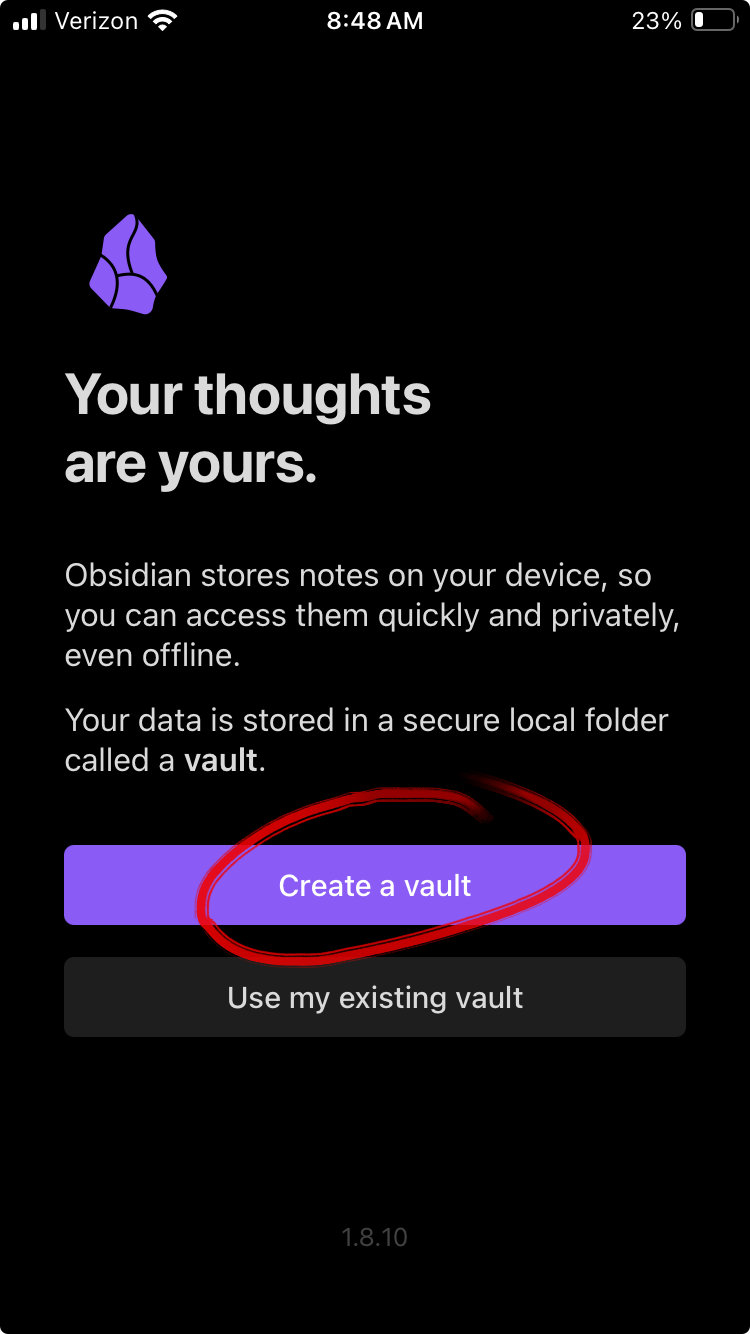
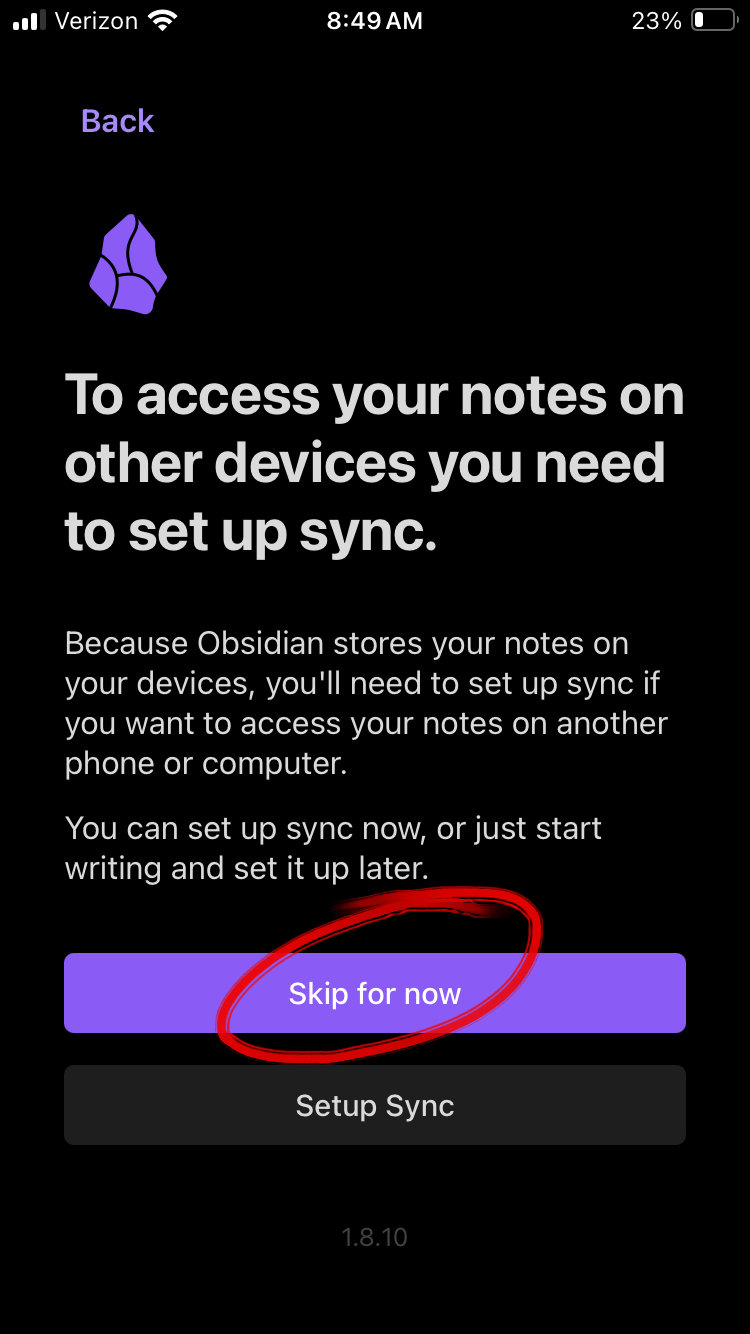
- Don't set up Sync—skip it, since that's a different service than what we're using here
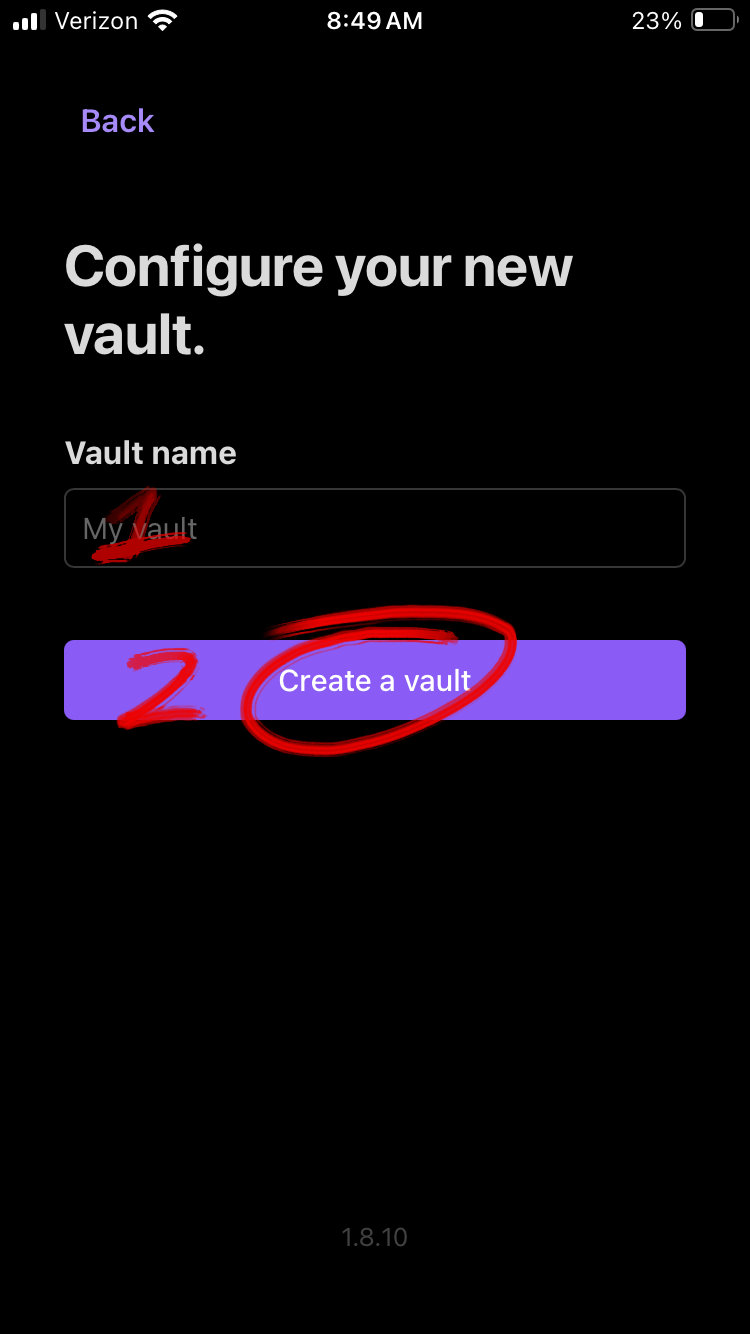
- Name your new vault and create it
Step 3: Link Vault to Repo
The heavy lifting of this project is going to be done by Working Copy. I hadn't found any good Git apps for iOS before this. You can use it completely for free and it doesn't even push ads.
- Open the Working copy app
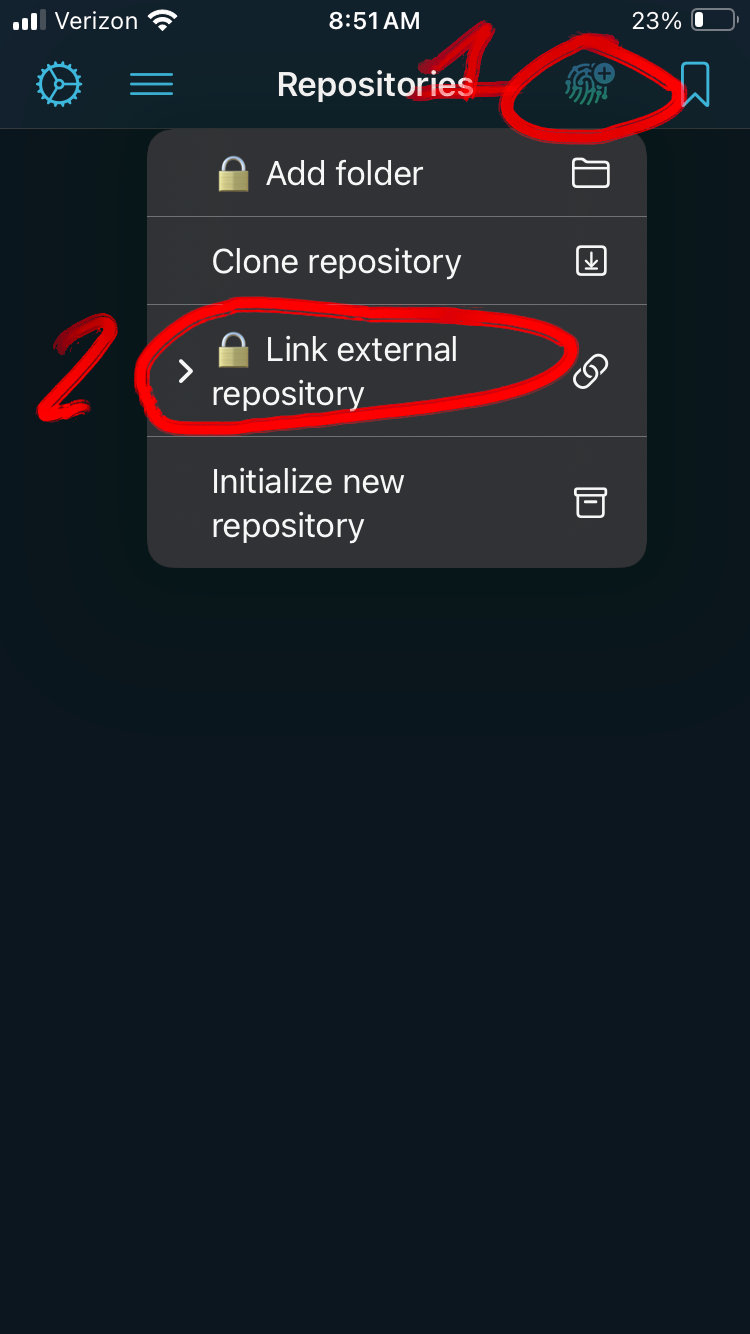
- Click on the fingerprint icon on the homepage
- Select the Link external repository. Before you login to a Git provider the button will have a lock emoji. Don't worry about it.
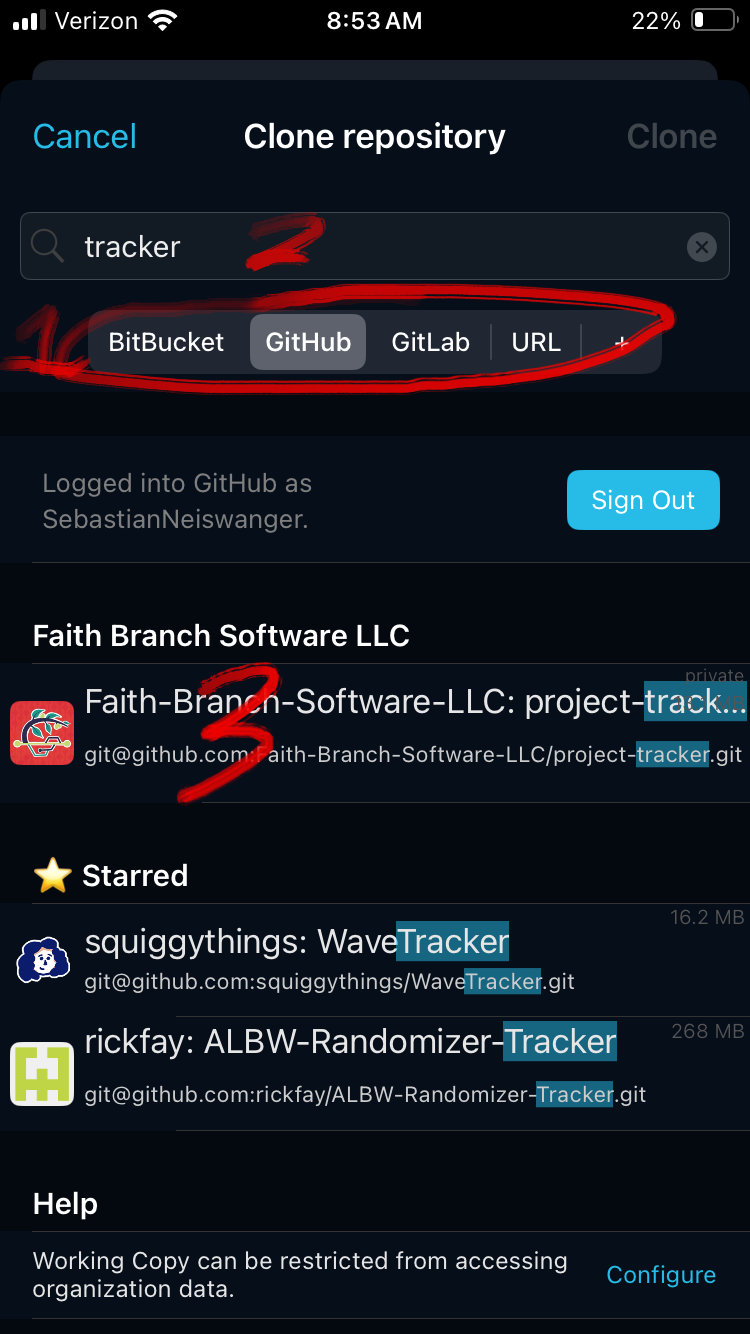
- Select your provider and login
- Search for the repository name of the one you created from Step 1: Create a Git Repo
- Select the correct repository
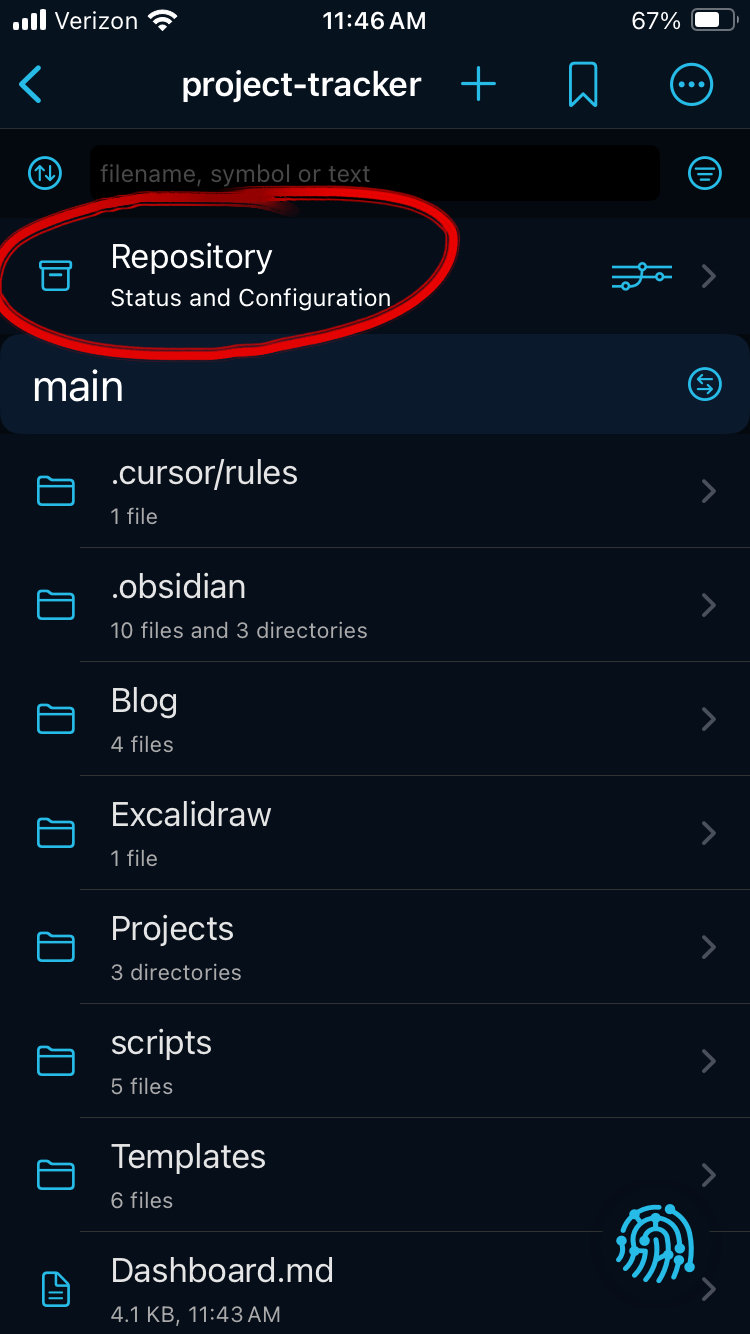
- You now have a copy of the repo on the app. It should open right after cloning.
- Select the Repository button from the inside of the repository
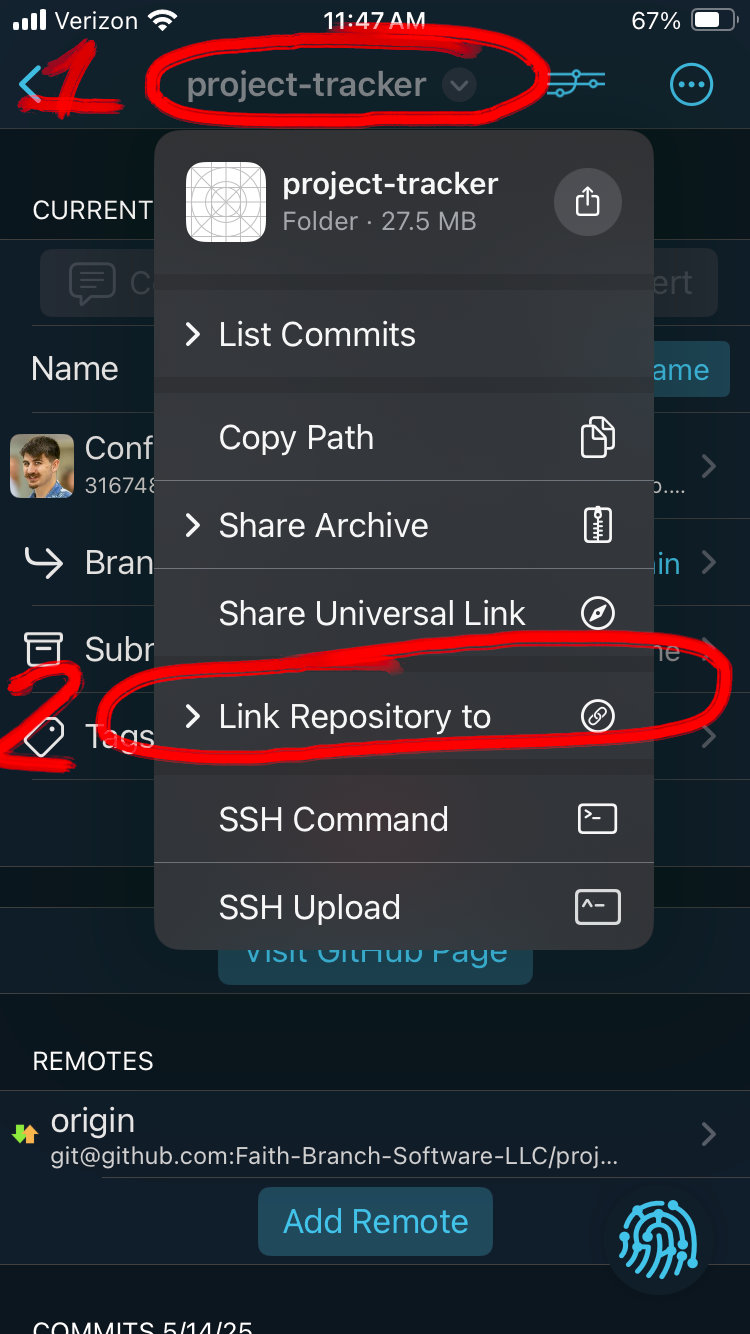
- Tap the repo name at the top of the screen—it should have an arrow next to it
- Select the
Link Repository tobutton
- Now select the
Directoryoption
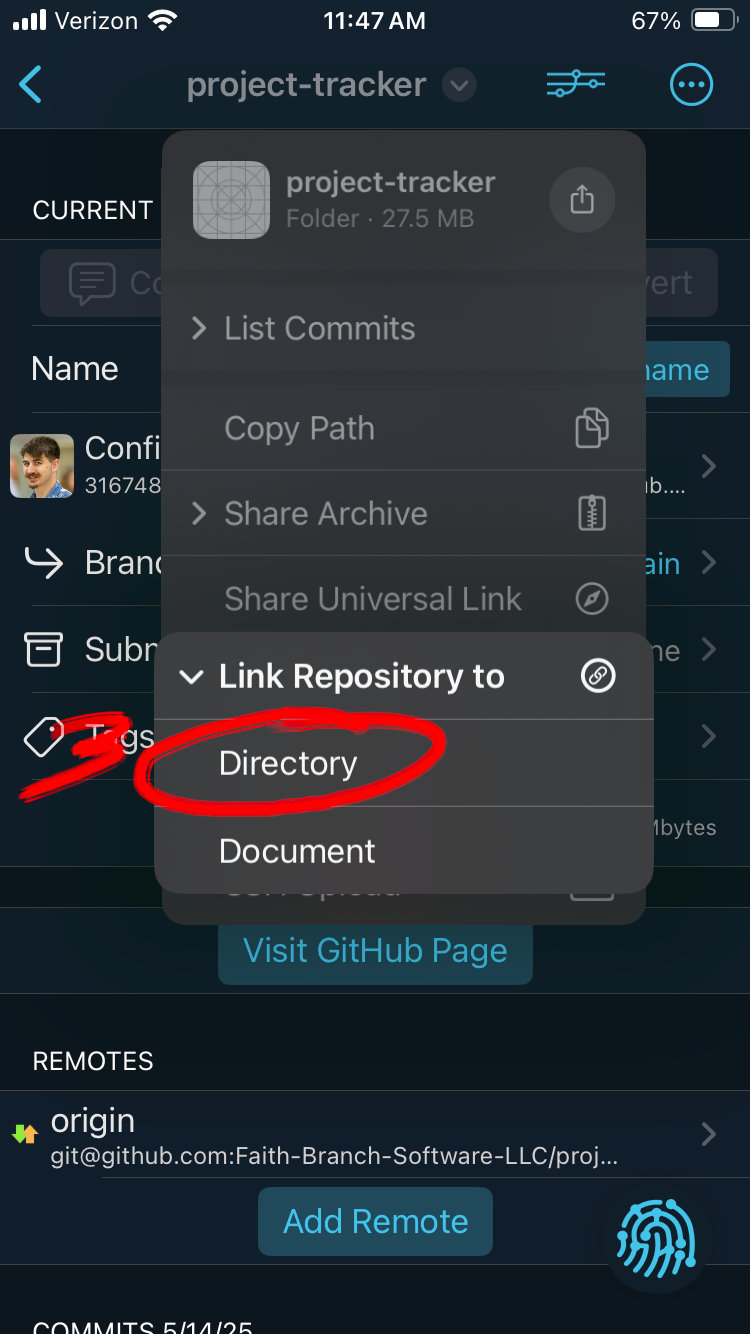
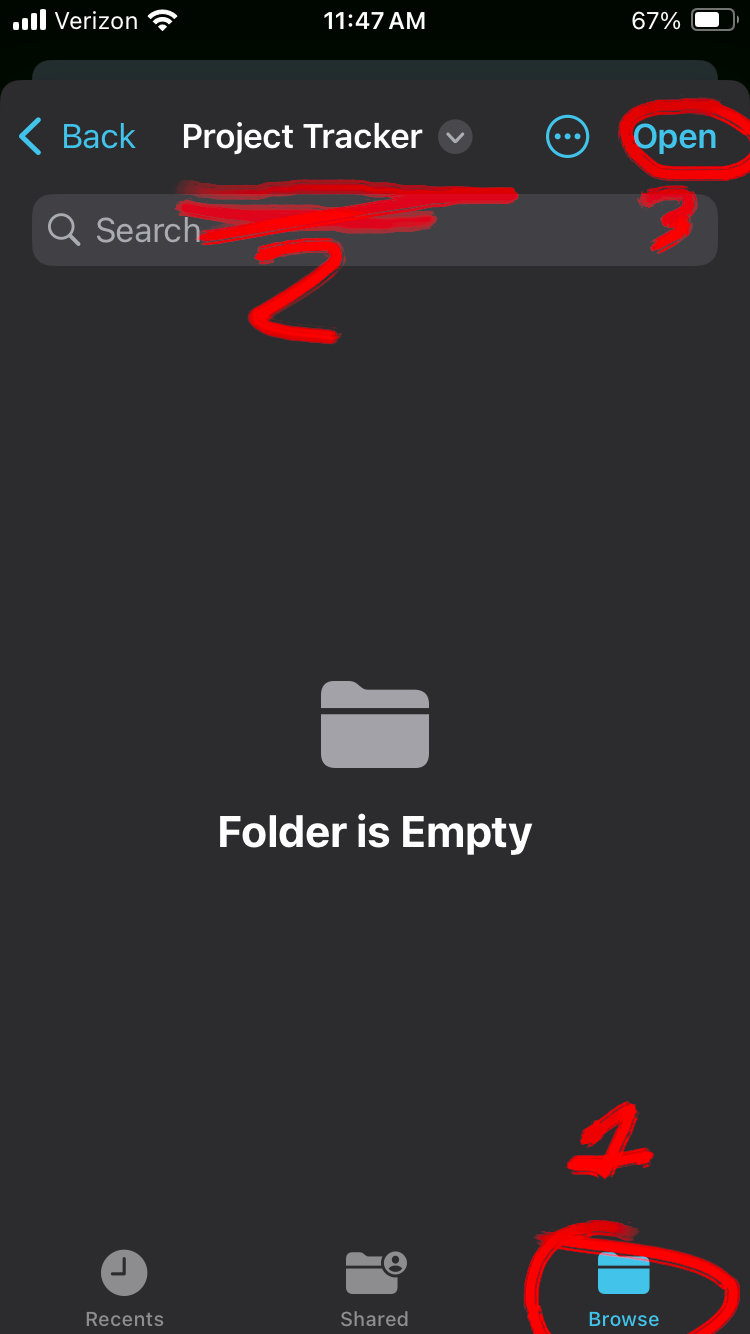
- Now navigate to the vault you created in Step 2: Create a Vault on mobile. This is just navigating through the files app. Mine was found at
Browse > On My iPhone > Obsidian > Project Tracker. - Make sure you are in the vault folder and press the
Openbutton
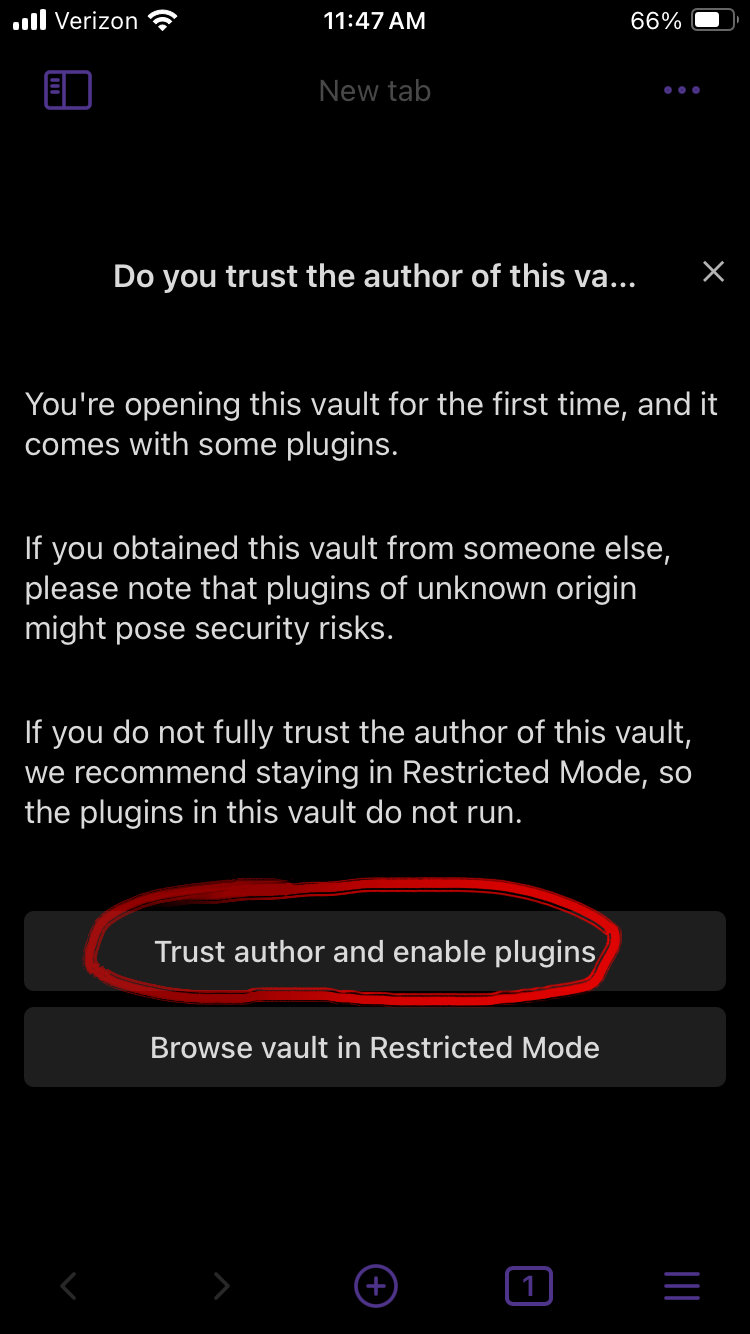
- Reopen Obsidian and the vault should have updated with the repository. For me, I already started the vault on desktop, so I had to trust the author (myself) and enable plugins.
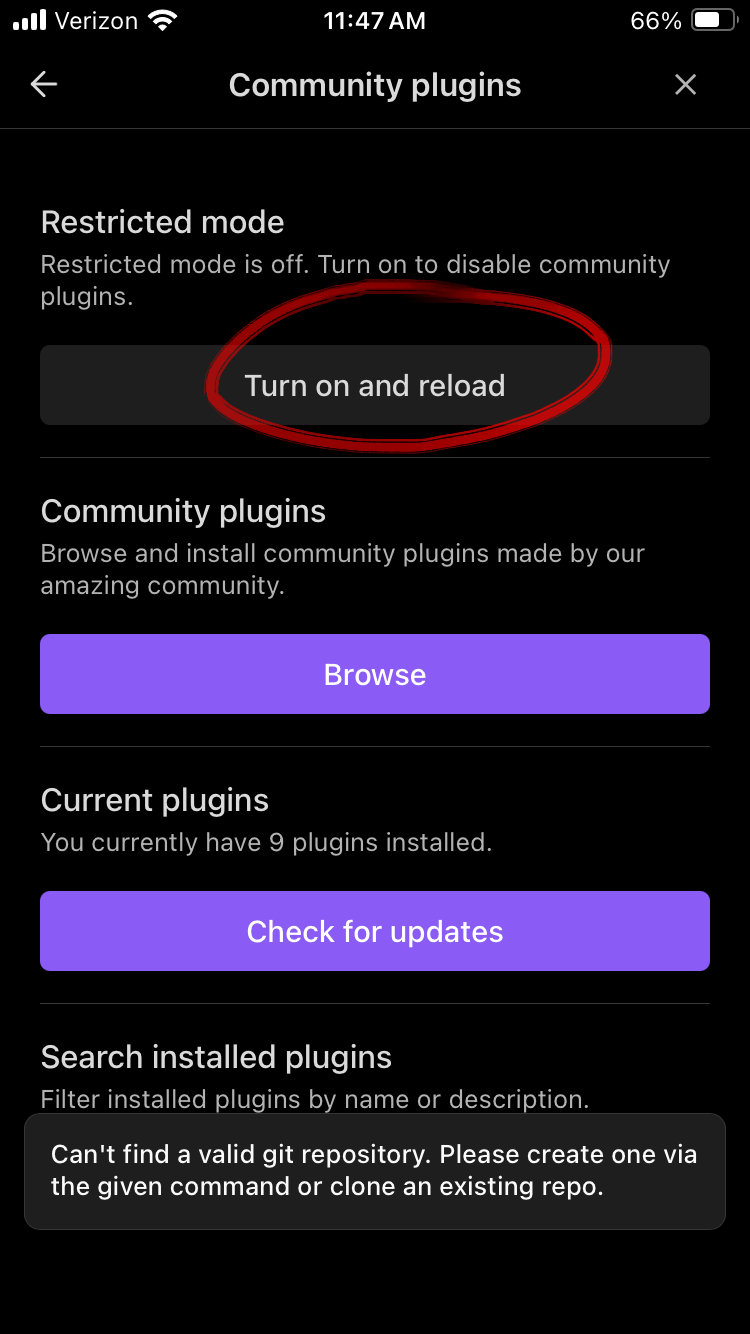
- Go into the menu and into the
Community pluginstab - Press the
Turn on and reloadbutton. This just allows community plugins, so I guess don't turn it on if you don't want them.
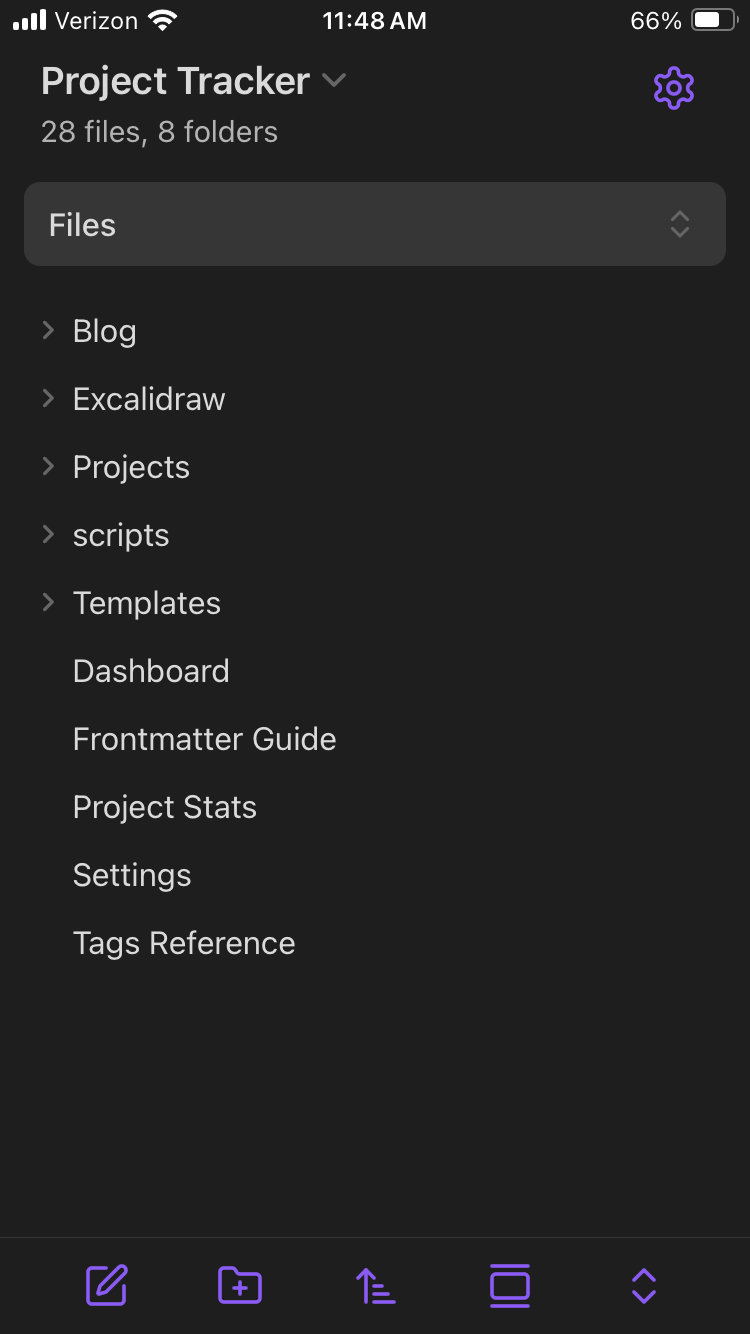
If you already had a started vault this is what the notes could look like in obsidian
Step 4: Saving Edits
Saving to Git is one side of the coin. If you want to work on desktop with updated notes this is crucial.
- Go into Working Copy
- Open the repository and select the
Repositorybutton - Press the
Commitbutton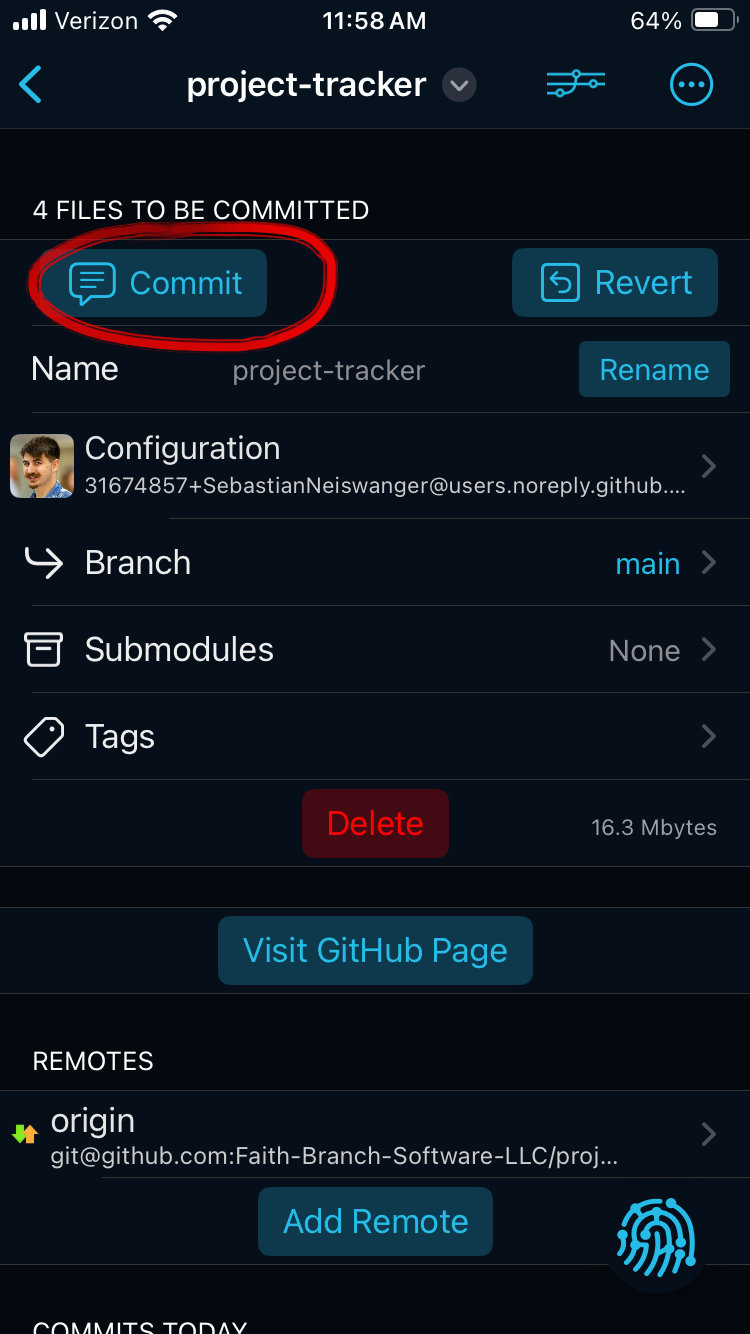
These can be done in basically any order. But I recommend:
- Press the
Addbutton, to stage all the changes - Name your commit something that makes sense for the work you did
- Select the
Pushswitch to make it green. This just saves a step later. - Once everything is good, select the
Commitbutton. This will commit and push the changes to your provider. If you had remote changes and forgot to pull them, then it will let you know. Just pull the changes (see Step 5: Receiving Edits) and then repeat this step.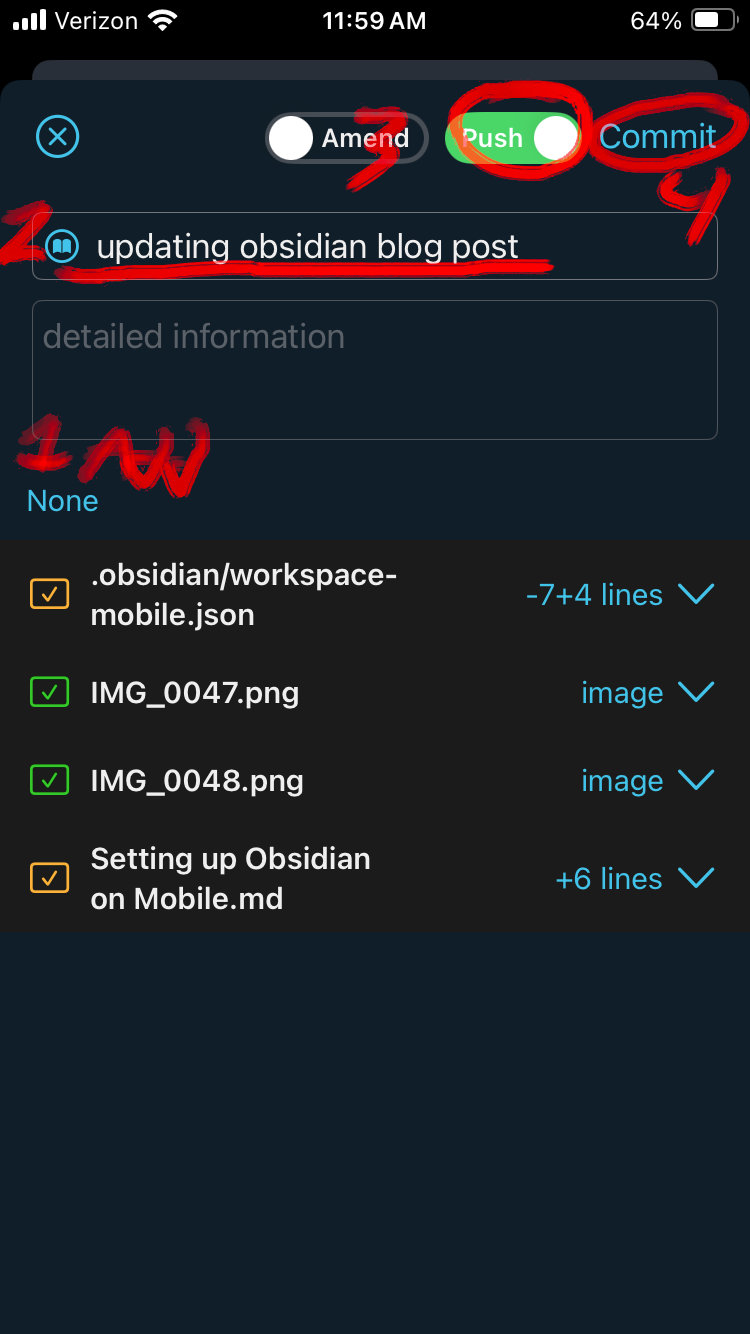
Step 5: Receiving Edits
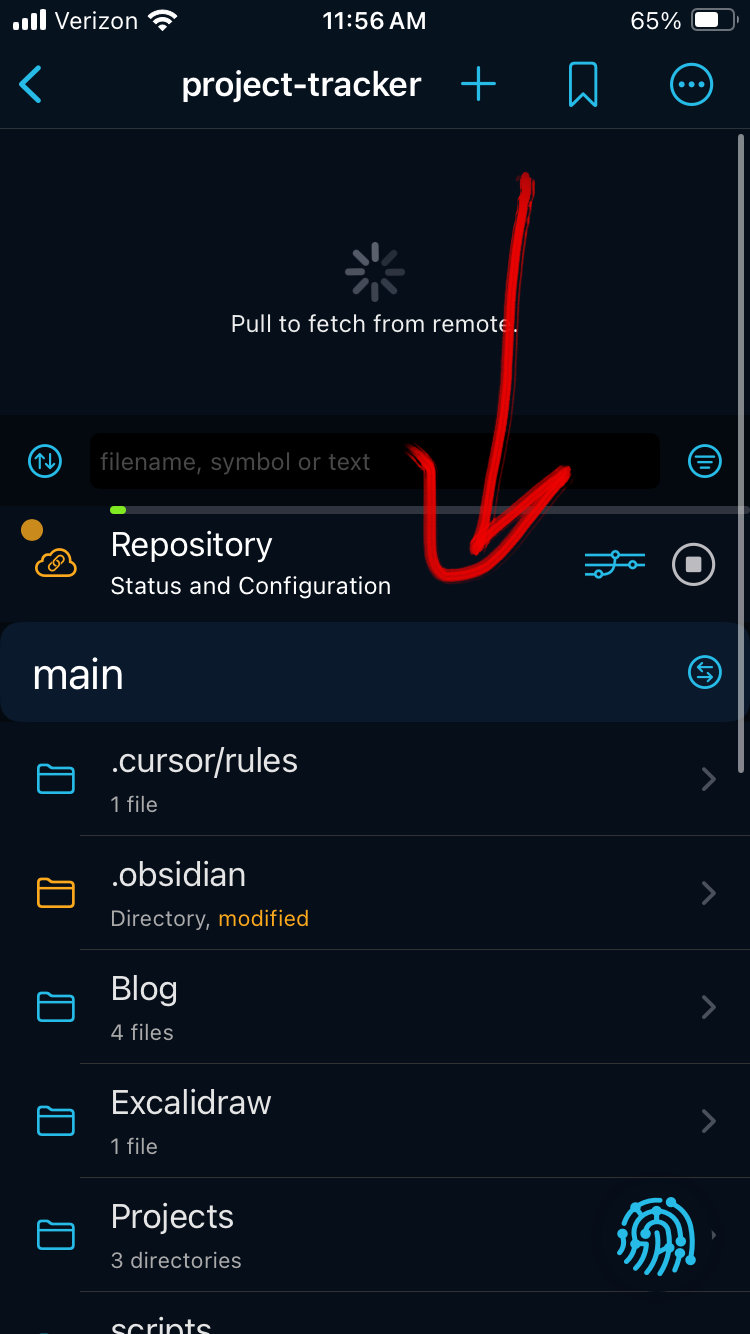
This is the other side of the coin. More often than not, you should do this step before making any changes. If you have pushed changes on another device it is recommended you pull all the changes before doing any work.
- Pull down on the screen in the repository. This will fetch any changes from the provider.
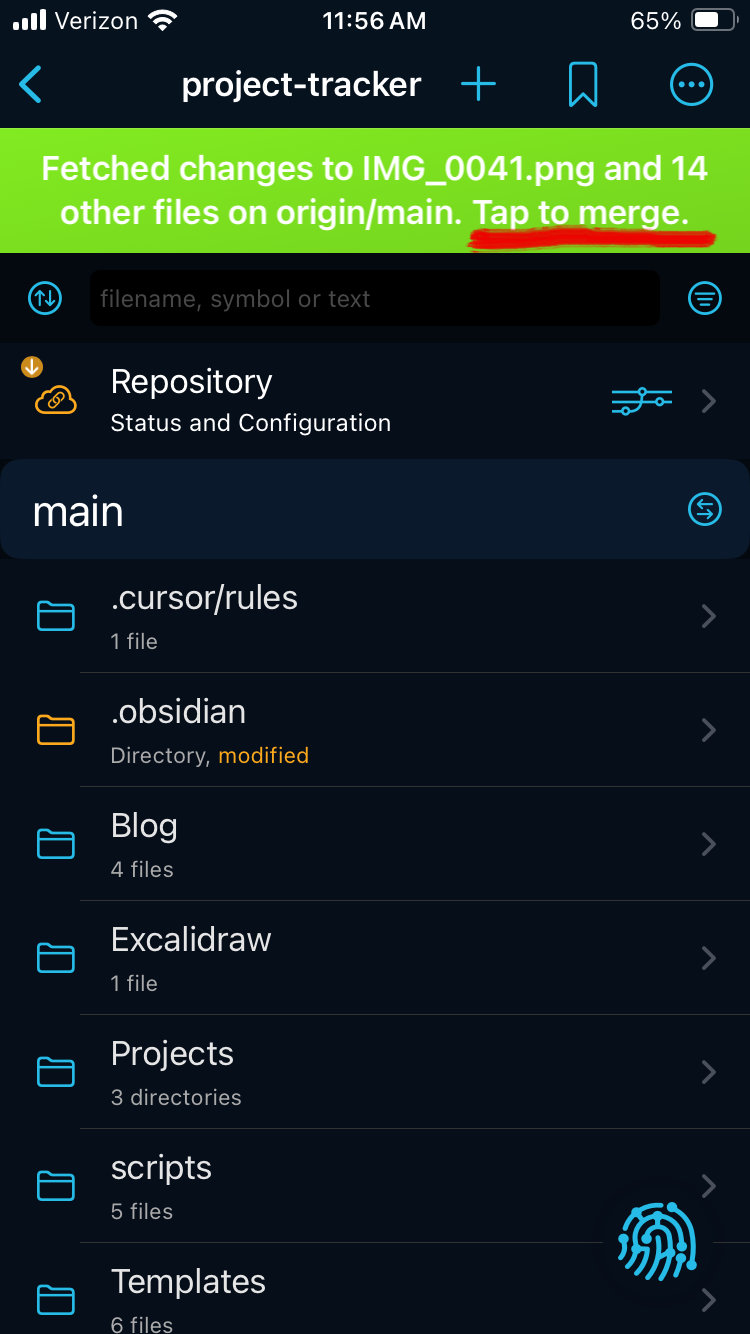
- If you have any changes just click the green banner and it will merge them onto your device.
© 2024 Faith Branch Software LLC. All rights reserved.